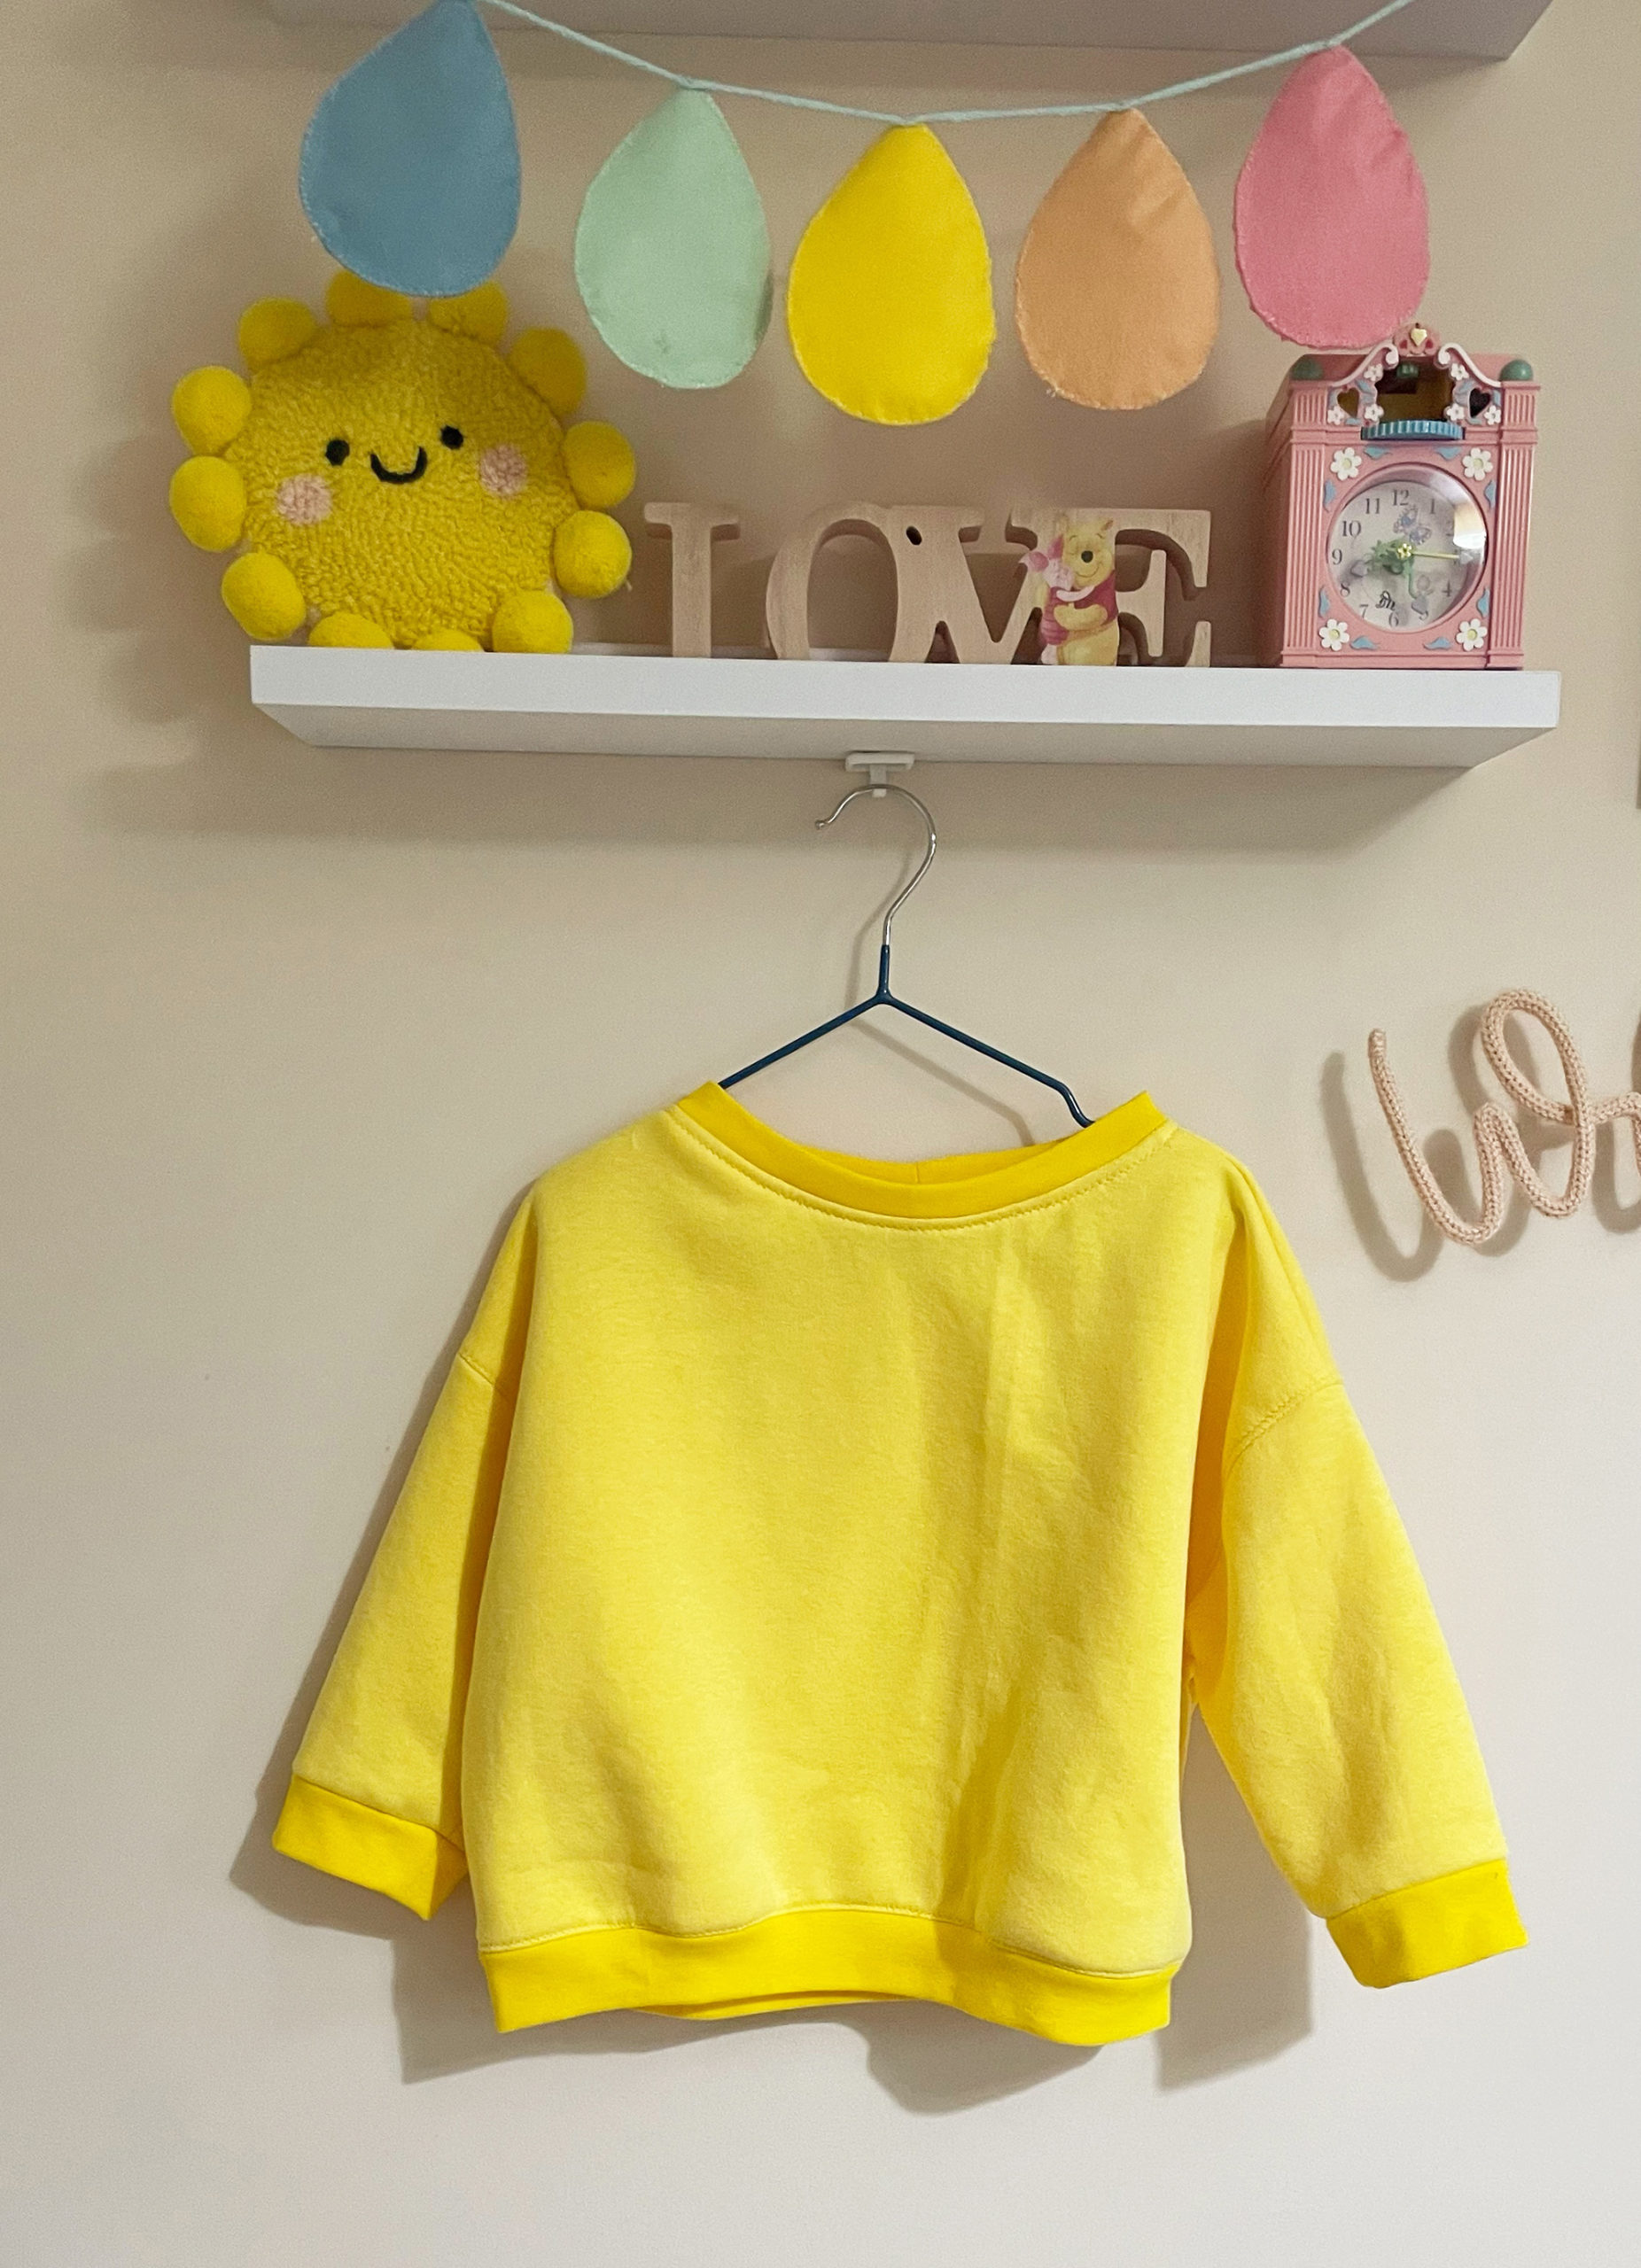
It’s been a while since I shared a sewing post on the blog, but hopefully, this is the start of many. In this post, I want to share how to draft and sew a sweatshirt pattern from an existing ready-to-wear sweater. I really love this sweater Willow has that I purchased secondhand as I love its oversized baggy sort of shape. It’s a fun and rewarding project that I managed to whip up during nap time! In this post, I will guide you through the steps for creating your own sweatshirt pattern and sewing it up.
Materials Needed:
- Sweatshirt fabric (I had roughly a 1 meter off cut)
- Matching thread
- Sweatshirt ribbing (1/2 meter)
- Scissors
- Measuring tape
- Ruler or Quilting Ruler
- Sewing machine – I use a Janome DKS100
- Pins
- Pattern paper or tracing paper
- Pencil or pen
- Iron – I use my Cricut Mini Press
- Mini ironing board
Measuring & Drafting the Pattern:
My method for drafting the pattern isn’t fancy by any means and required a few improvisational methods to achieve the finished outcome, but stick with me for snazzy sweatshirt time, woo!
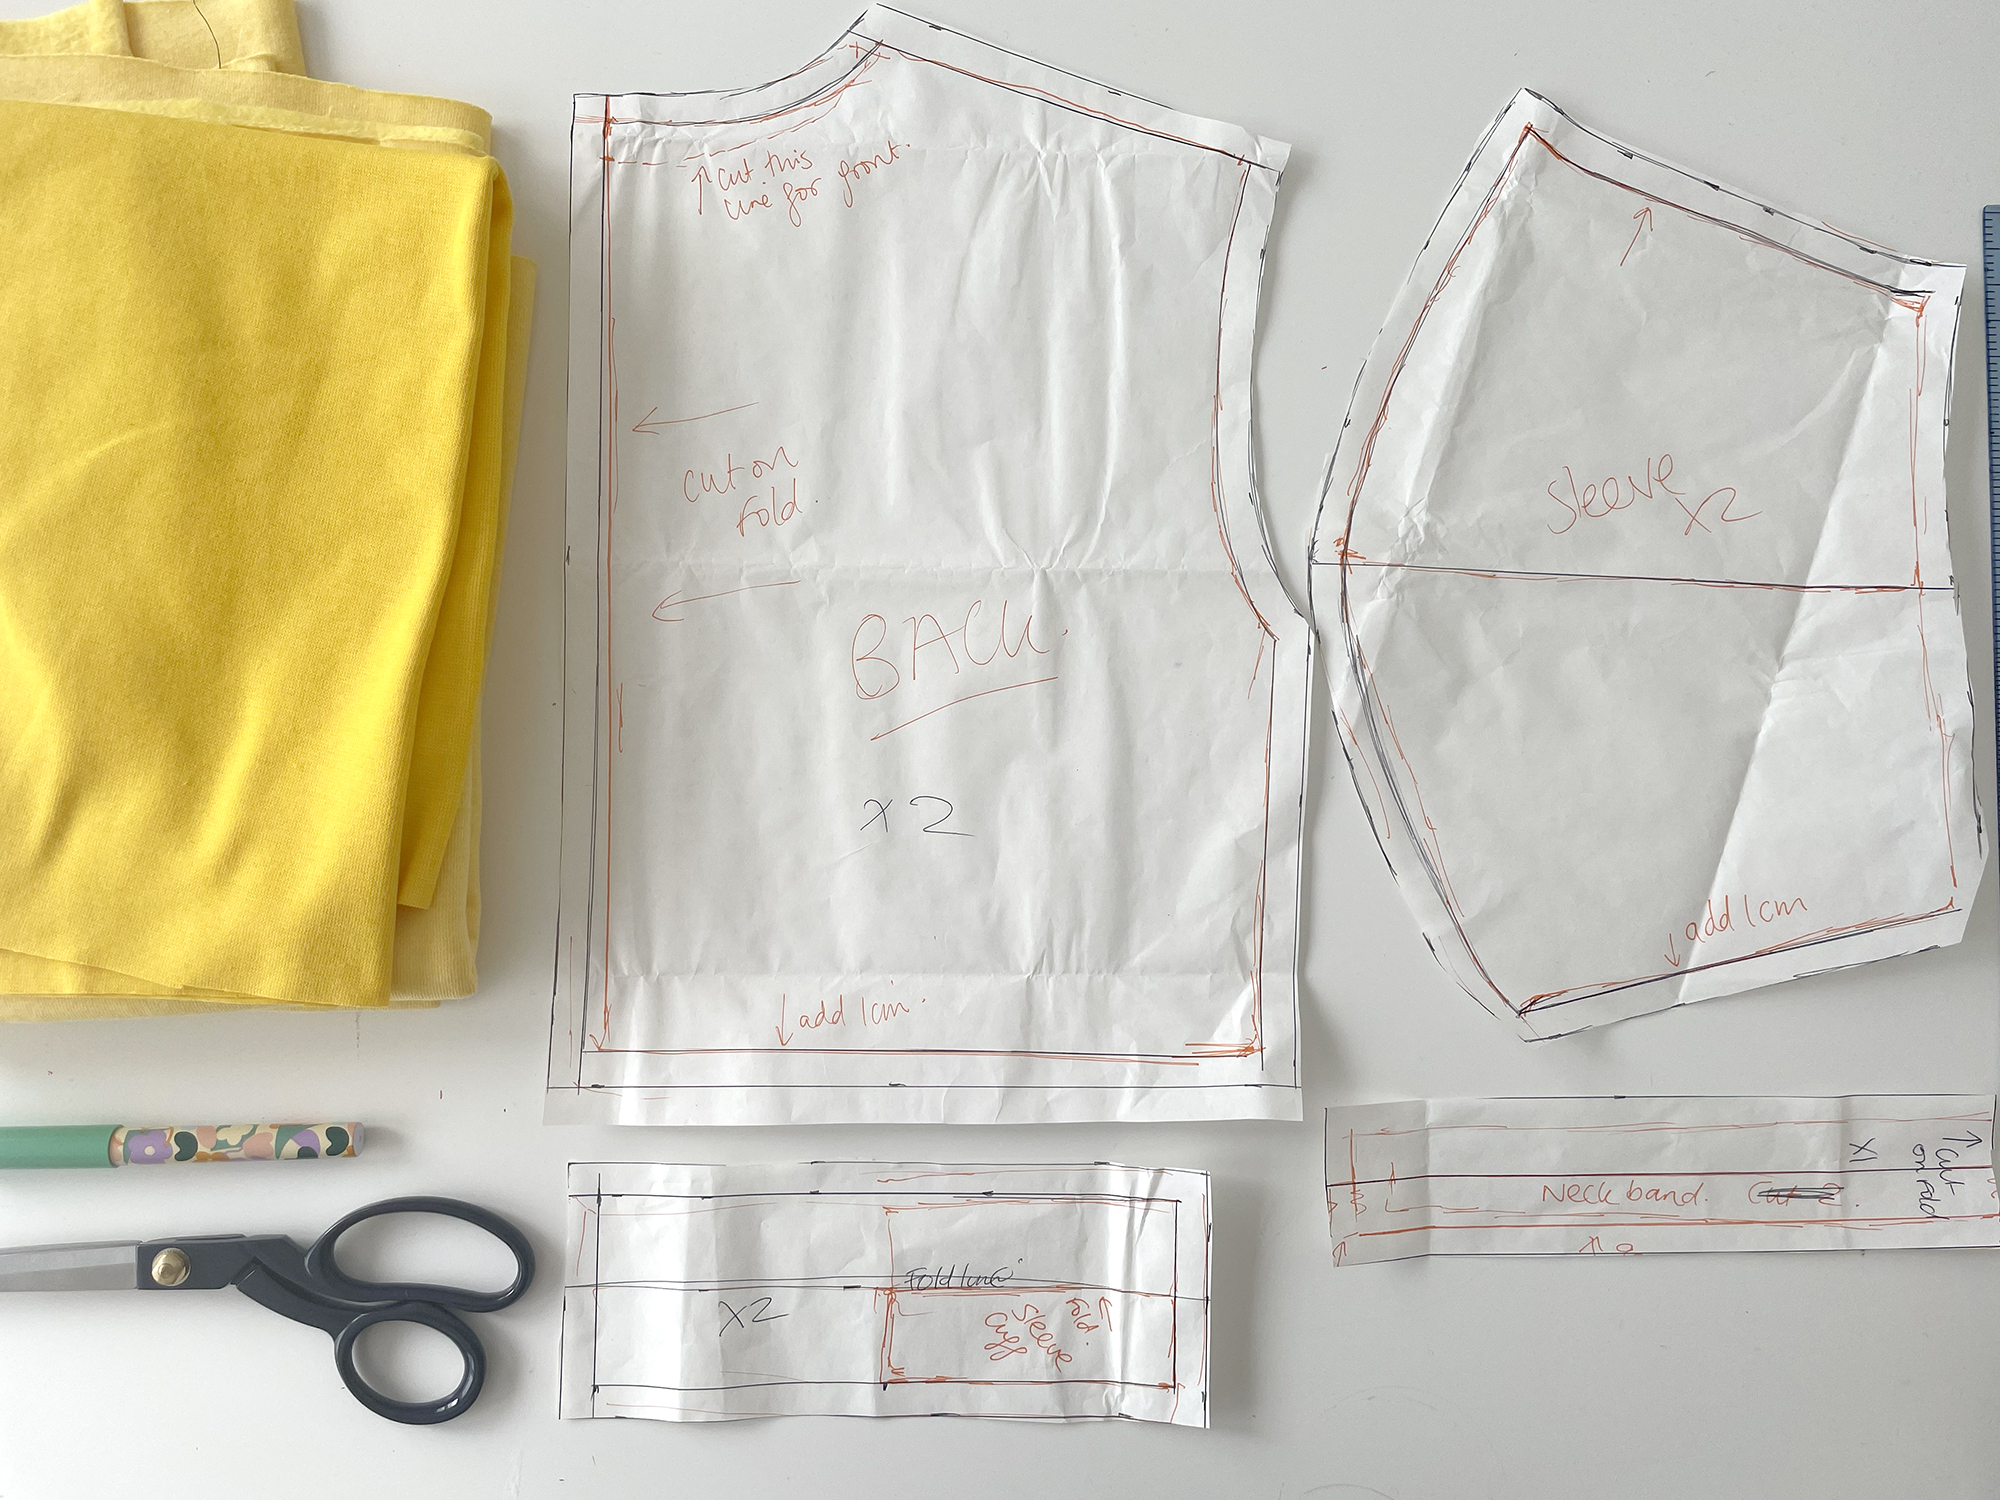
Step 1: Lay out your tracing paper on a flat surface, and lay the ready-to-wear sweatshirt on top. Make sure the sweatshirt is one you know will fit.
Step 2: Using a pencil, slowly draw around the shape of the body, keeping the sweatshirt as flat as it can be, and holding the seam edges on the paper to get an accurate tracing. Don’t worry about seam allowance at this point because we refine and add them later, just focus on the basic shape.
Once you have traced the outline of half the body, fold the sweater in half. Draw a straight line where the center front of the body would be. (This later will become our ‘cut on fold’ line for the body.
Step 3: Repeat the tracing process with the sleeve, you only need to trace one as this will then be cut on the fold to mirror the piece.
Step 4: Measure the sleeve cuffs, neck ribbing, and hem ribbing by taking the width and height. You then double the height (smaller measurement), double the length, and then add 1cm all the way around to create the shape with your seam allowance.
Refining the Pattern:
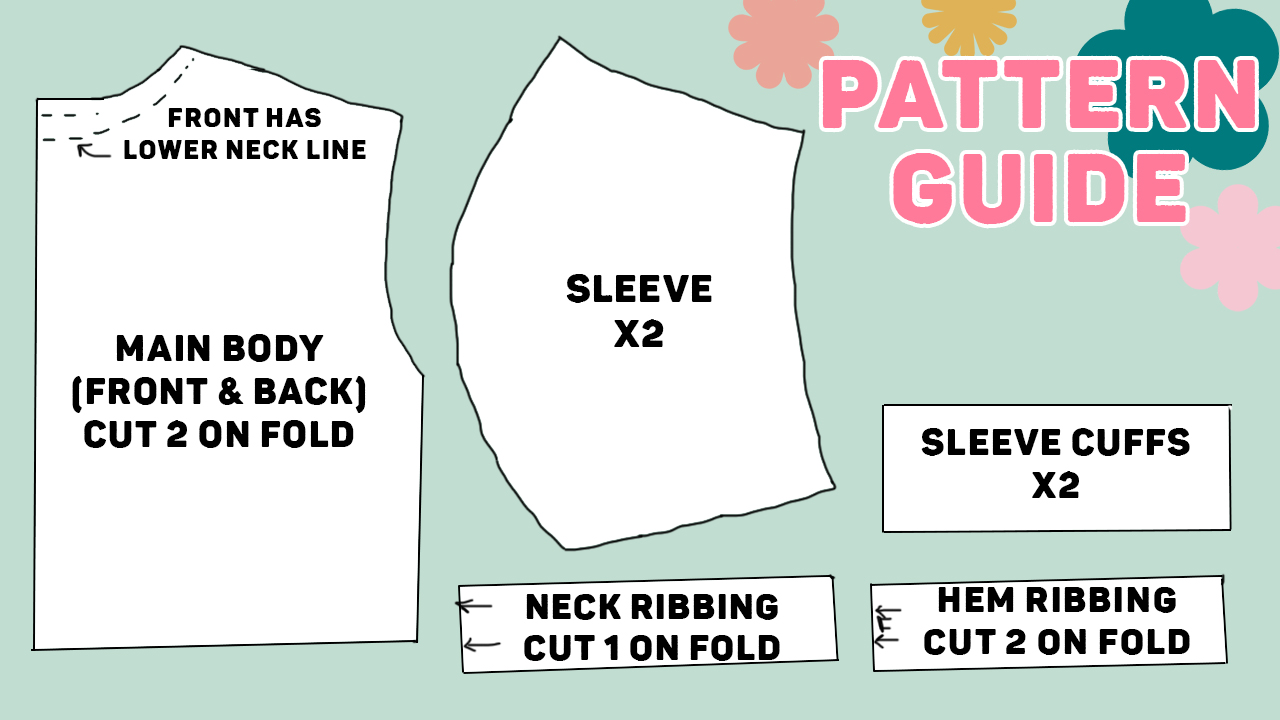
Once you have traced the ready-to-wear sweater it’s now time to refine the tracing lines to create the pattern. I have created a diagram/guide above so you can see visually how the pieces should look.
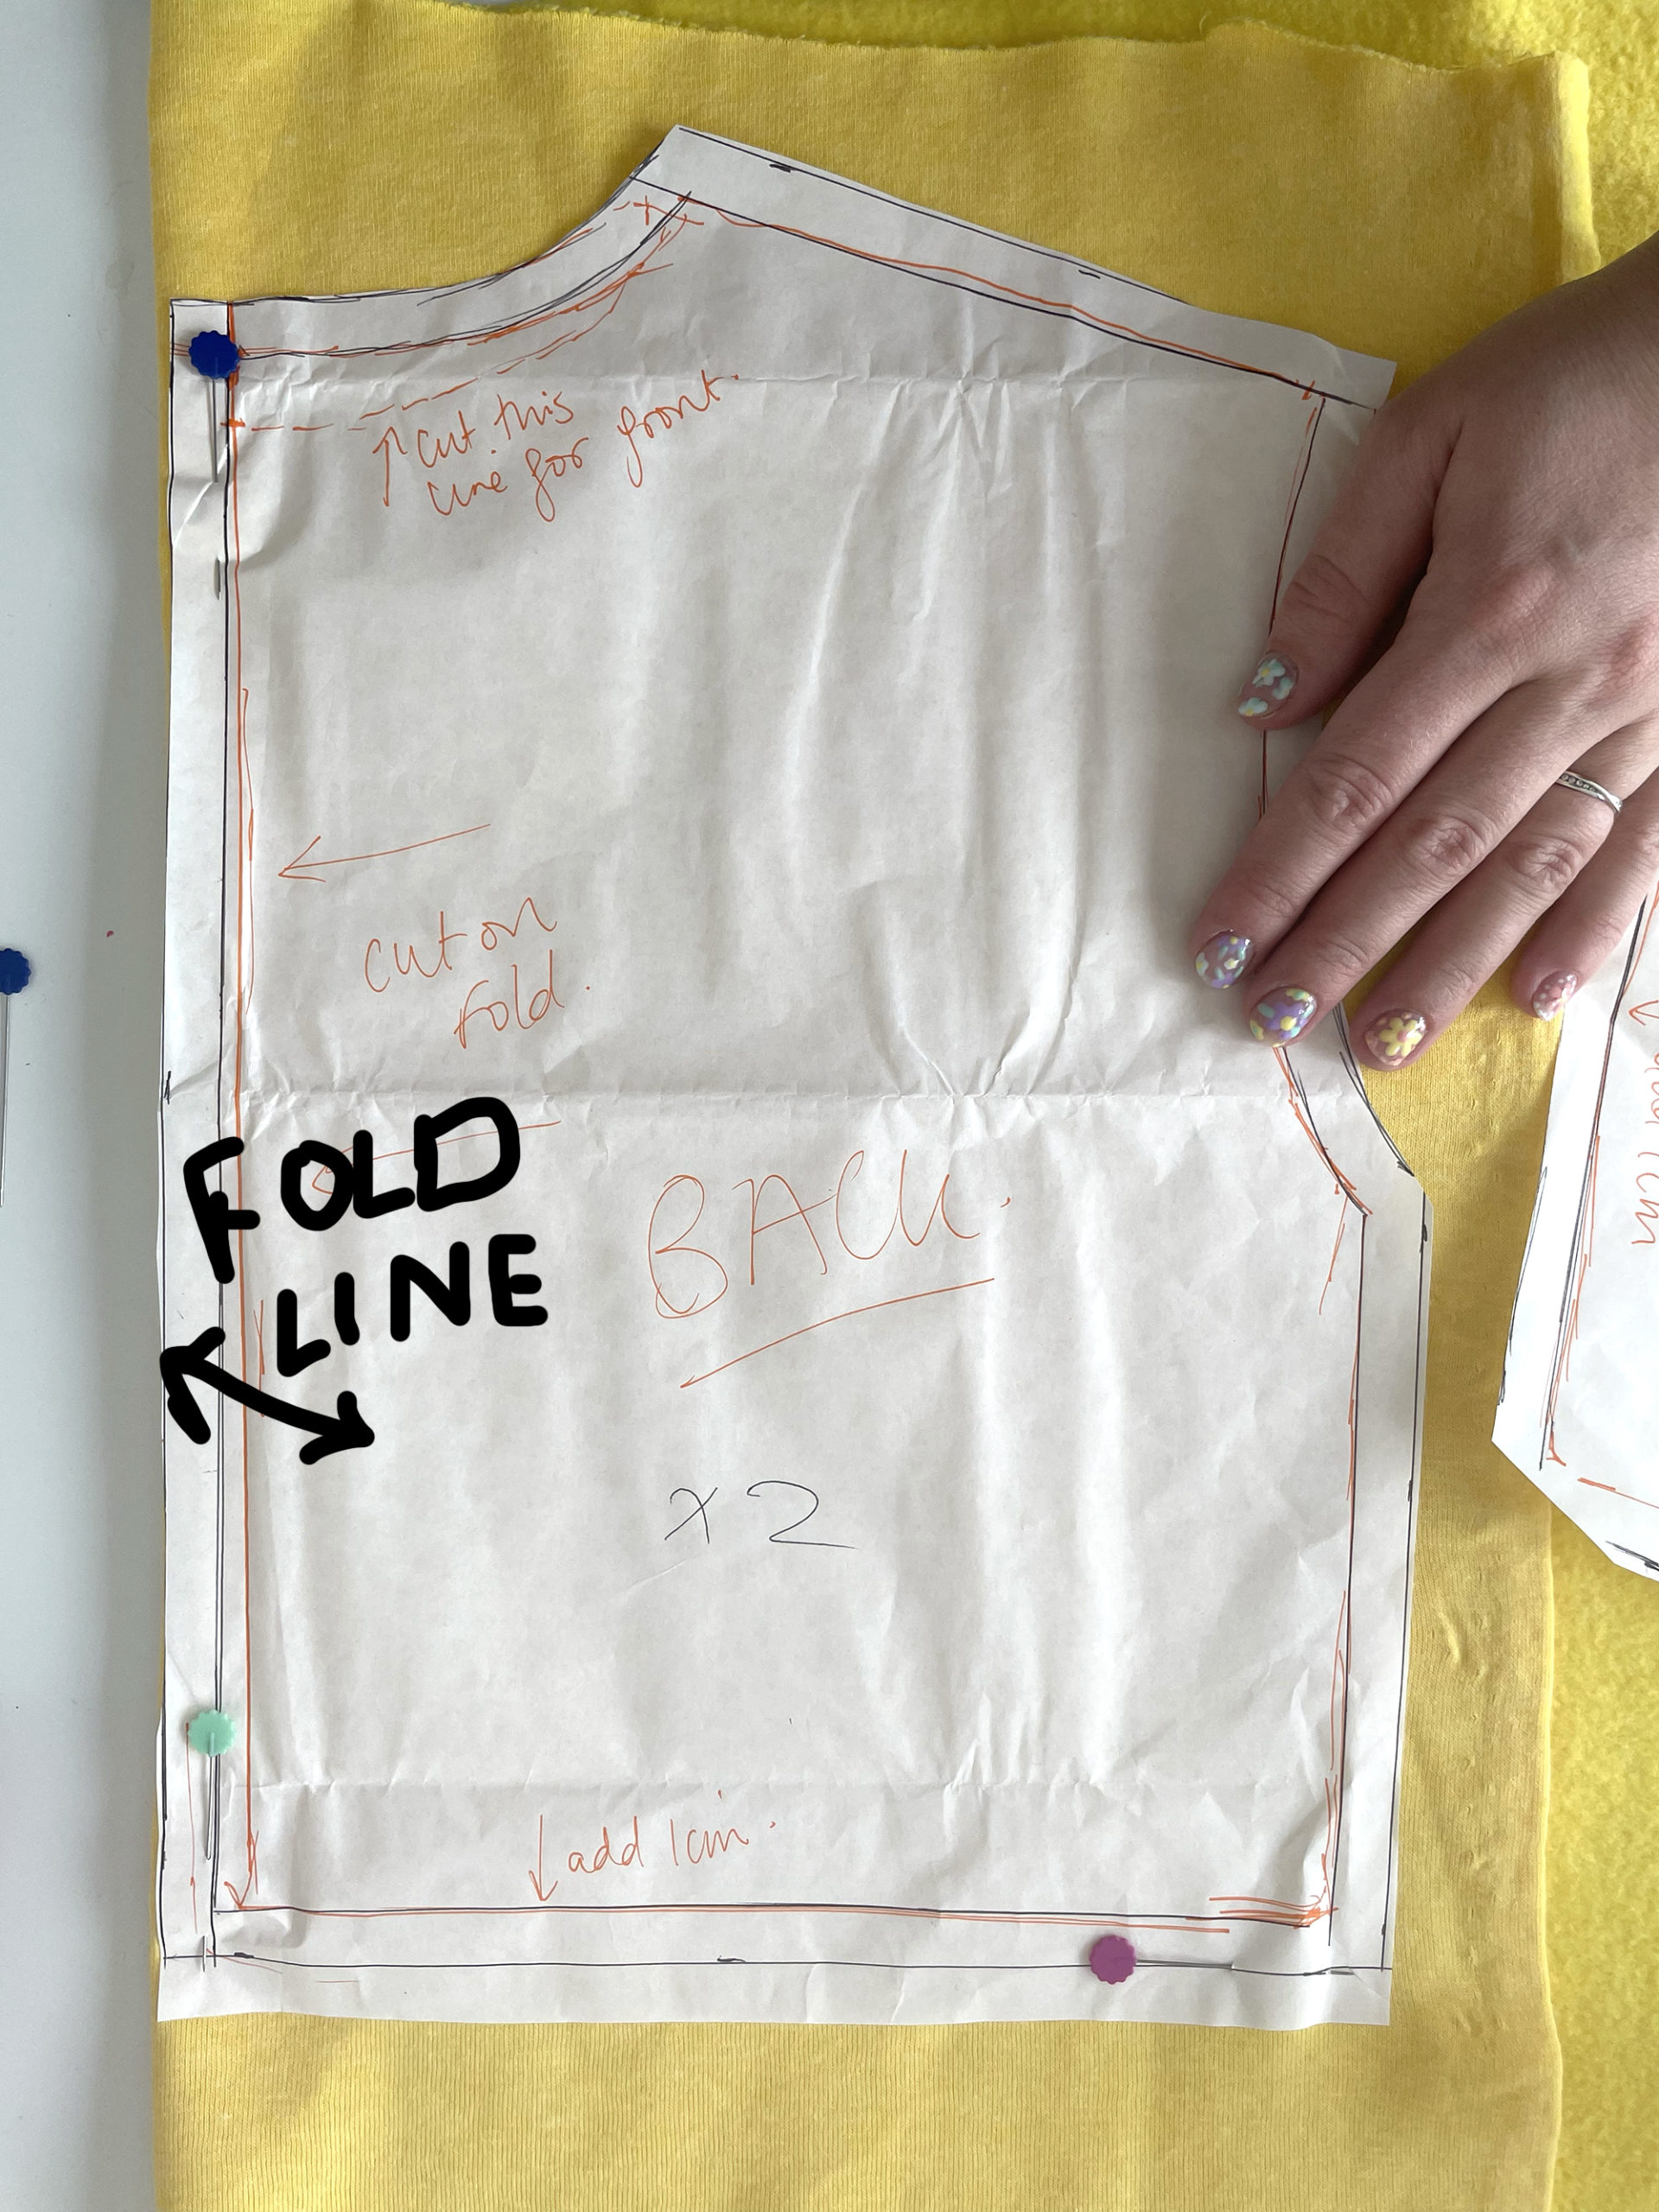
- There is just 1 main body piece, that you cut X2, the body front just has a slightly lower neckline but you can cut that directly on the fabric. Add 1cm to the pattern shape all the way around apart from the ‘cut on fold’ line which is your center front and center back.
- For the sleeve pattern, neaten up the curve shape and then measure each side to make sure they’re the same measurement (as these pieces meet up and get sewn together). Also, you can use a soft tape measure to measure the armscye of the main body piece, with the armscye curve of the sleeve piece to make sure they measure the same and will also match up. Once you’re happy with the shape and measurements all meeting up, add a 1cm seam allowance around the entire thing. Cut 2 of the piece on the fold.
- Same again with the sleeve cuffs, neck ribbing, and hem ribbing, make sure you measure them, then measure the sleeve hem, main body hem, and neckline curves to check and make sure you’re happy. Top tip: The ribbing pieces will be quite a bit smaller than the main pattern pieces, this creates a nice edge to knit fabrics and helps with stretch when wearing.
Sewing it together
*1cm seam allowance. *Sew using a ballpoint or sharp needle, on a zigzag stitch. Mine was set to 1.5 wide and 2.5 long.
Step 1: right sides facing, using a 1cm seam allowance, pin the shoulder seams of the front and back body pieces together and stitch. Repeat on both sides.
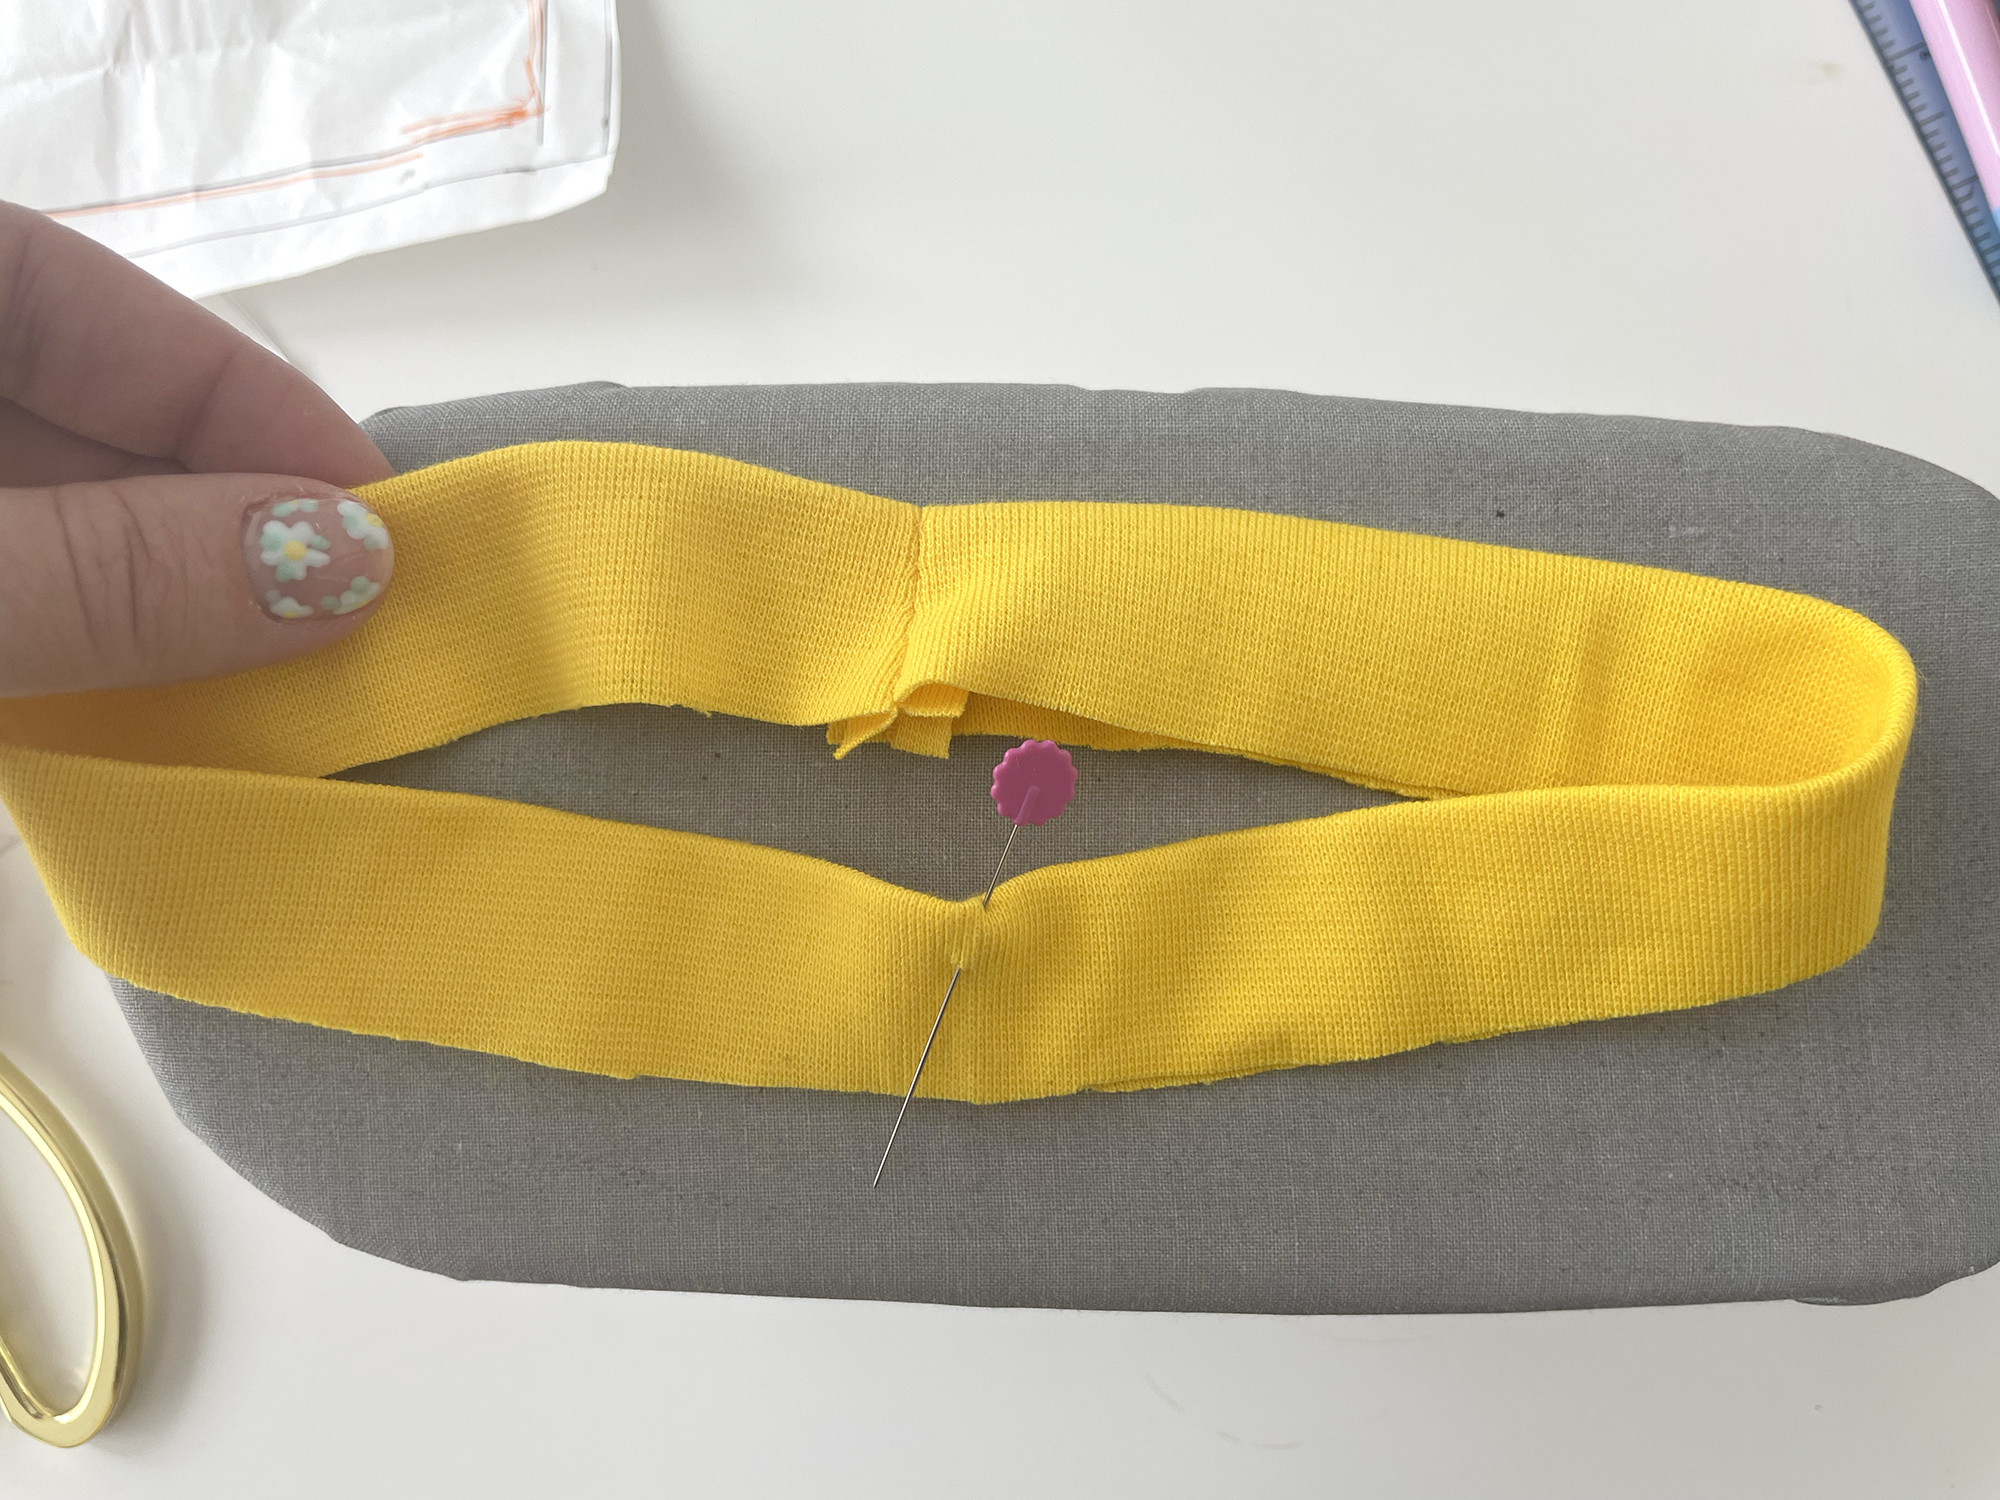
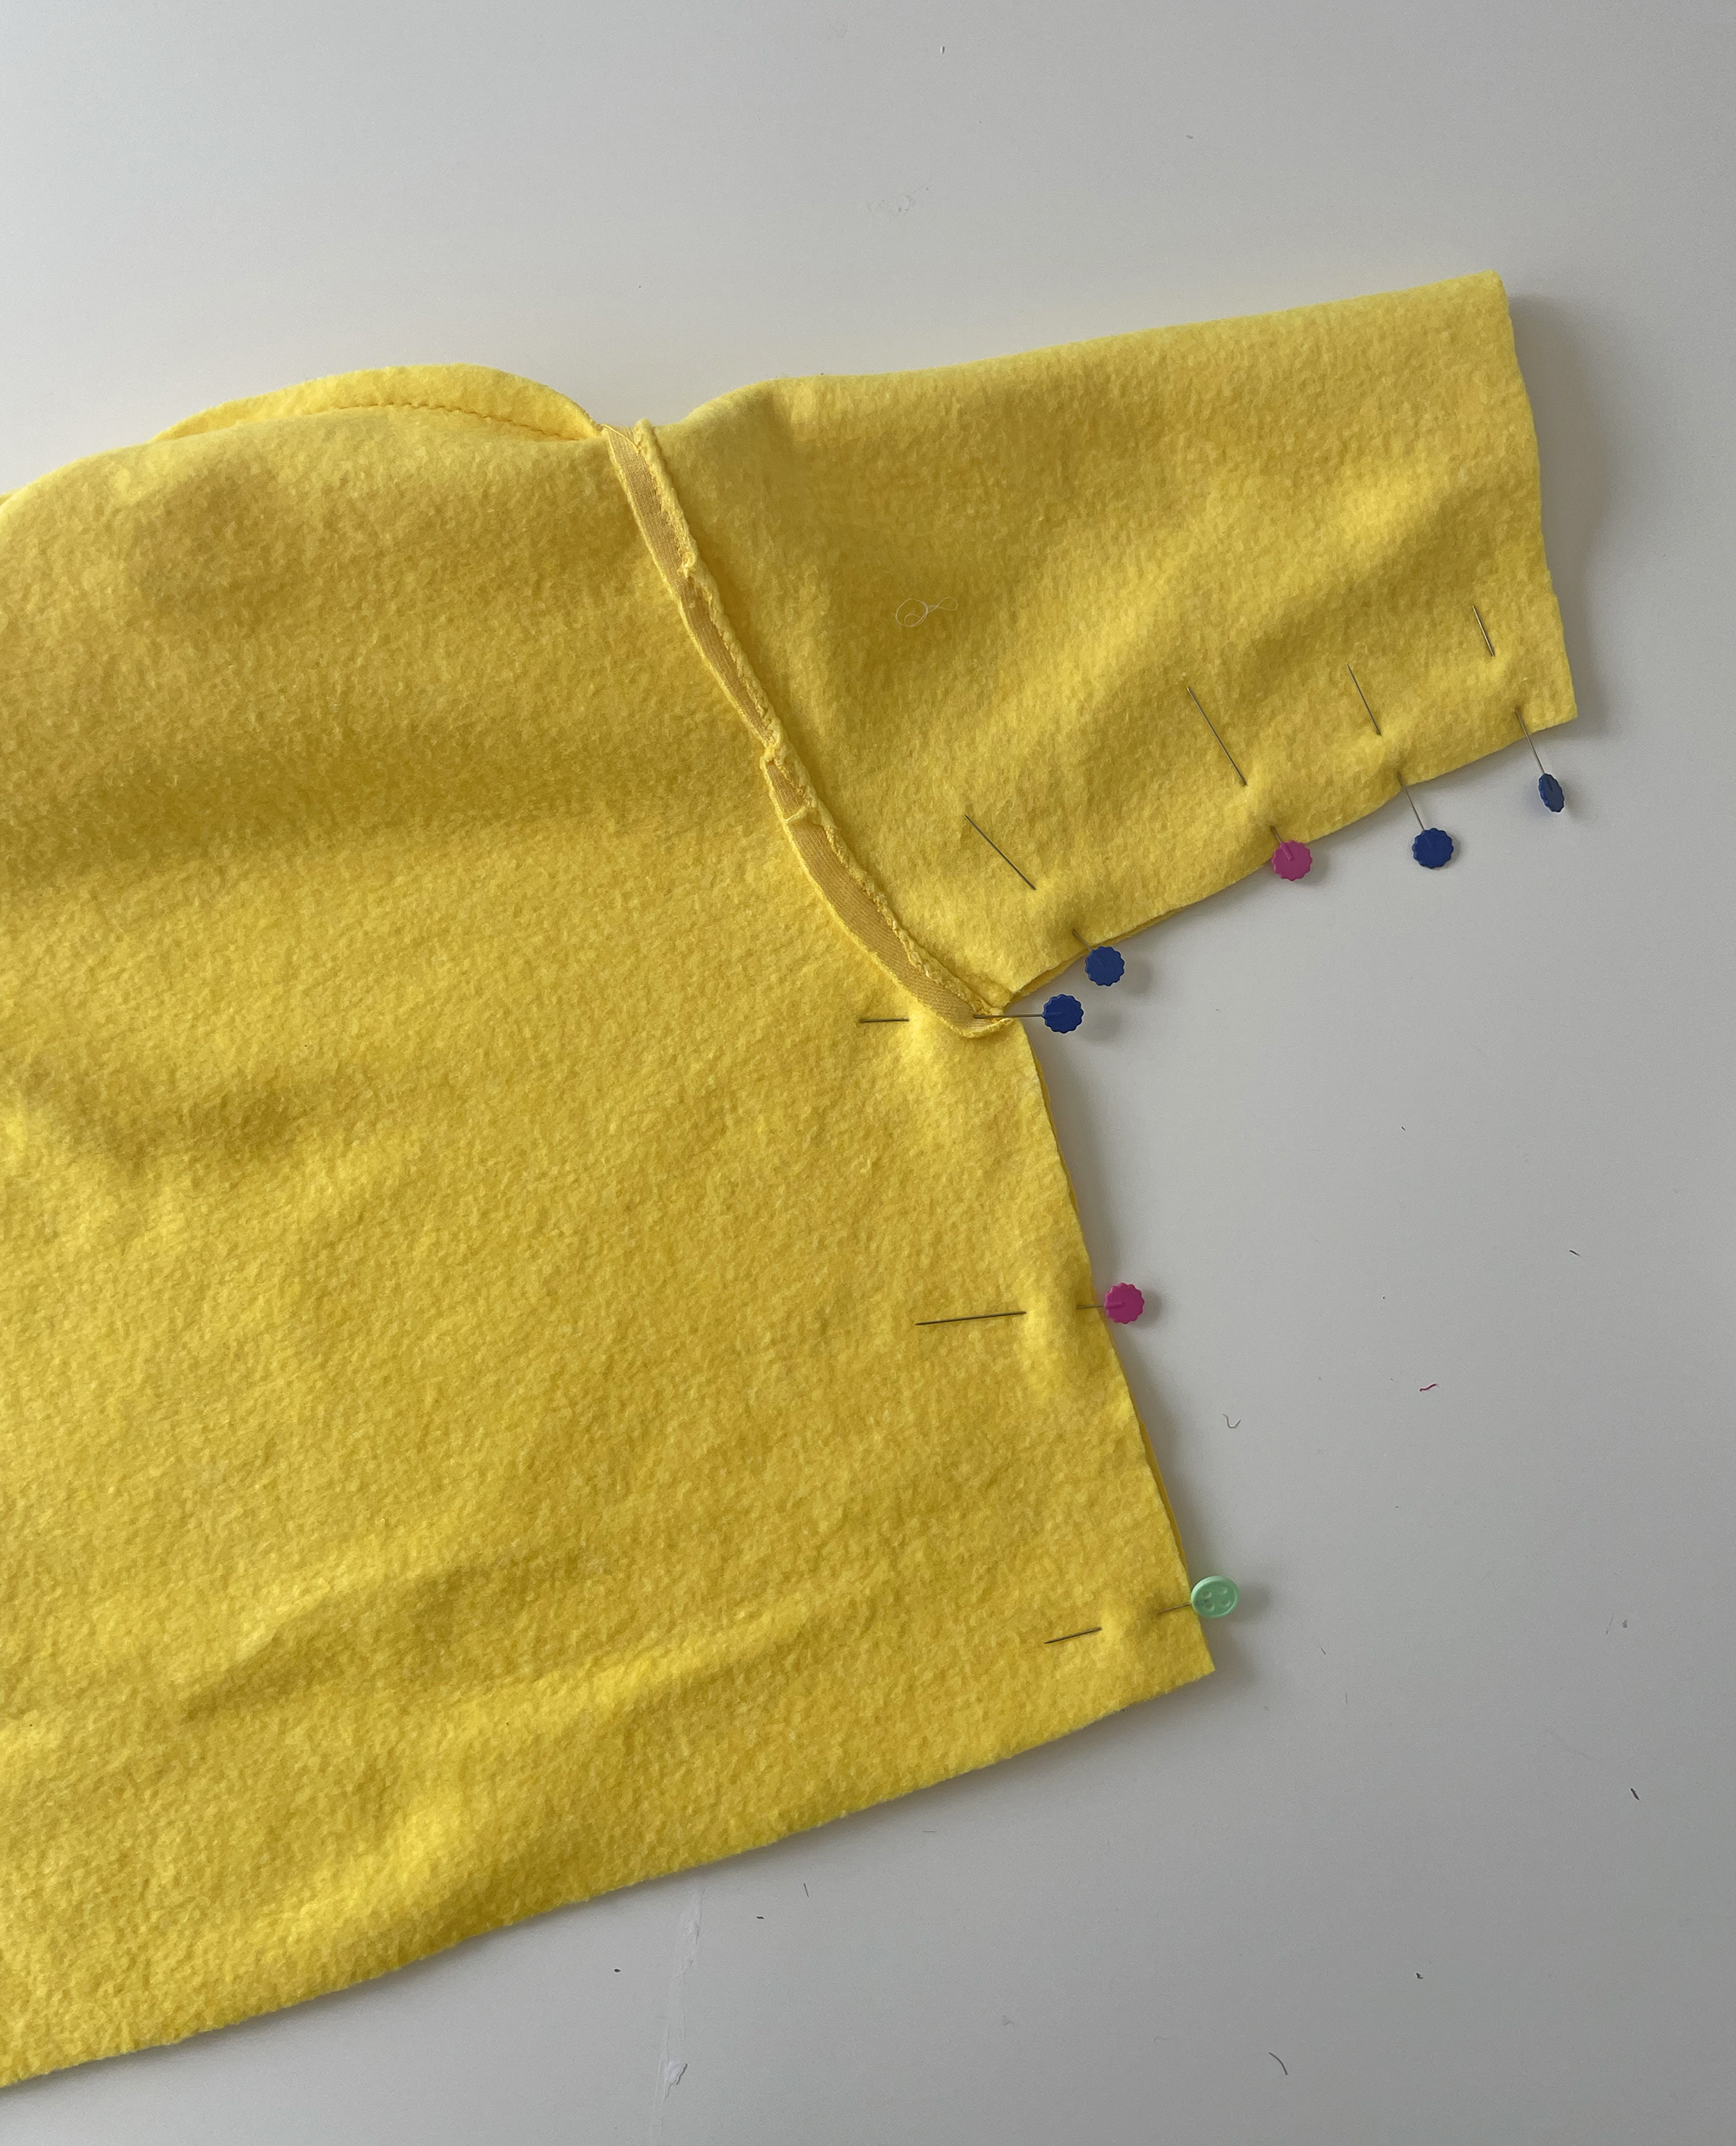
Step 2: Fold your neck ribbing in half right sides together and stitch the 2 small ends together. Press the seam open. Fold lengthways wrong side together, and press, creating a loop.
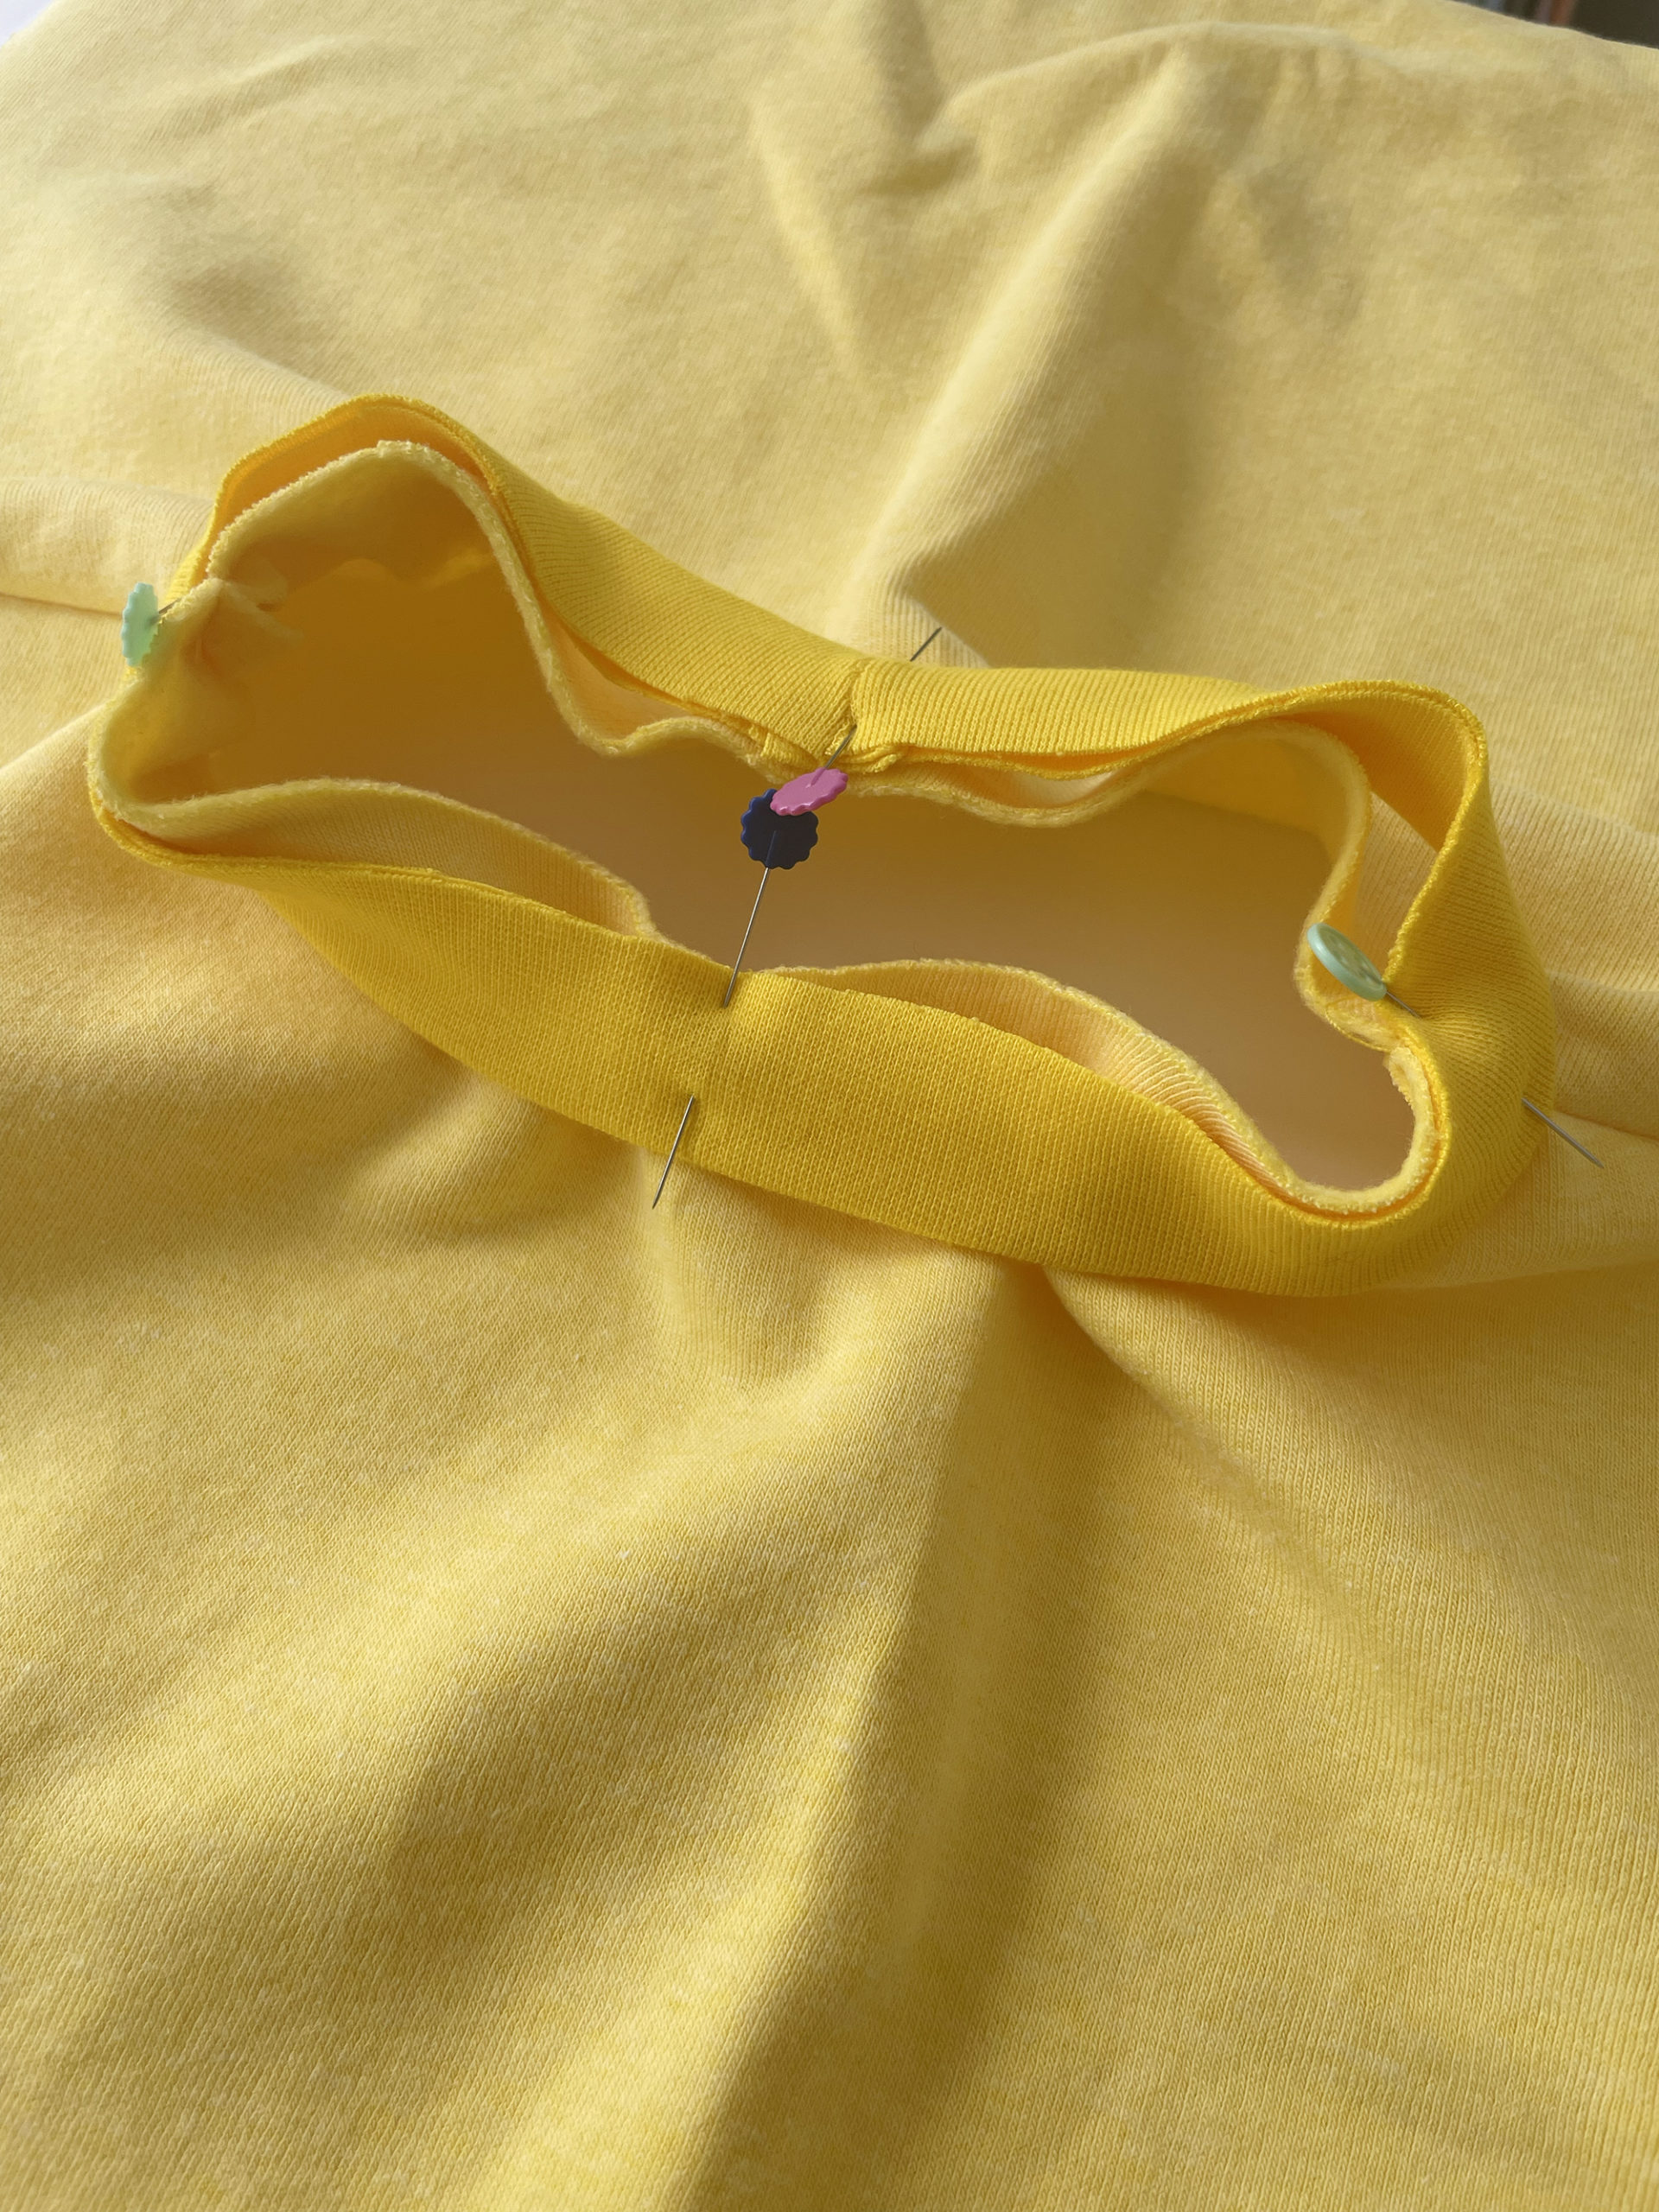
Step 3: Pin the neck ribbing to the neck opening of the body pieces, find the center back and pin the seam of the ribbing there and work your way around. The ribbing will be slightly smaller than the main pieces so you will need to slightly ease and stretch the ribbing as you sew. Press the seam allowance towards the body.
Step 4: Topstitch the seam allowance to the main body.
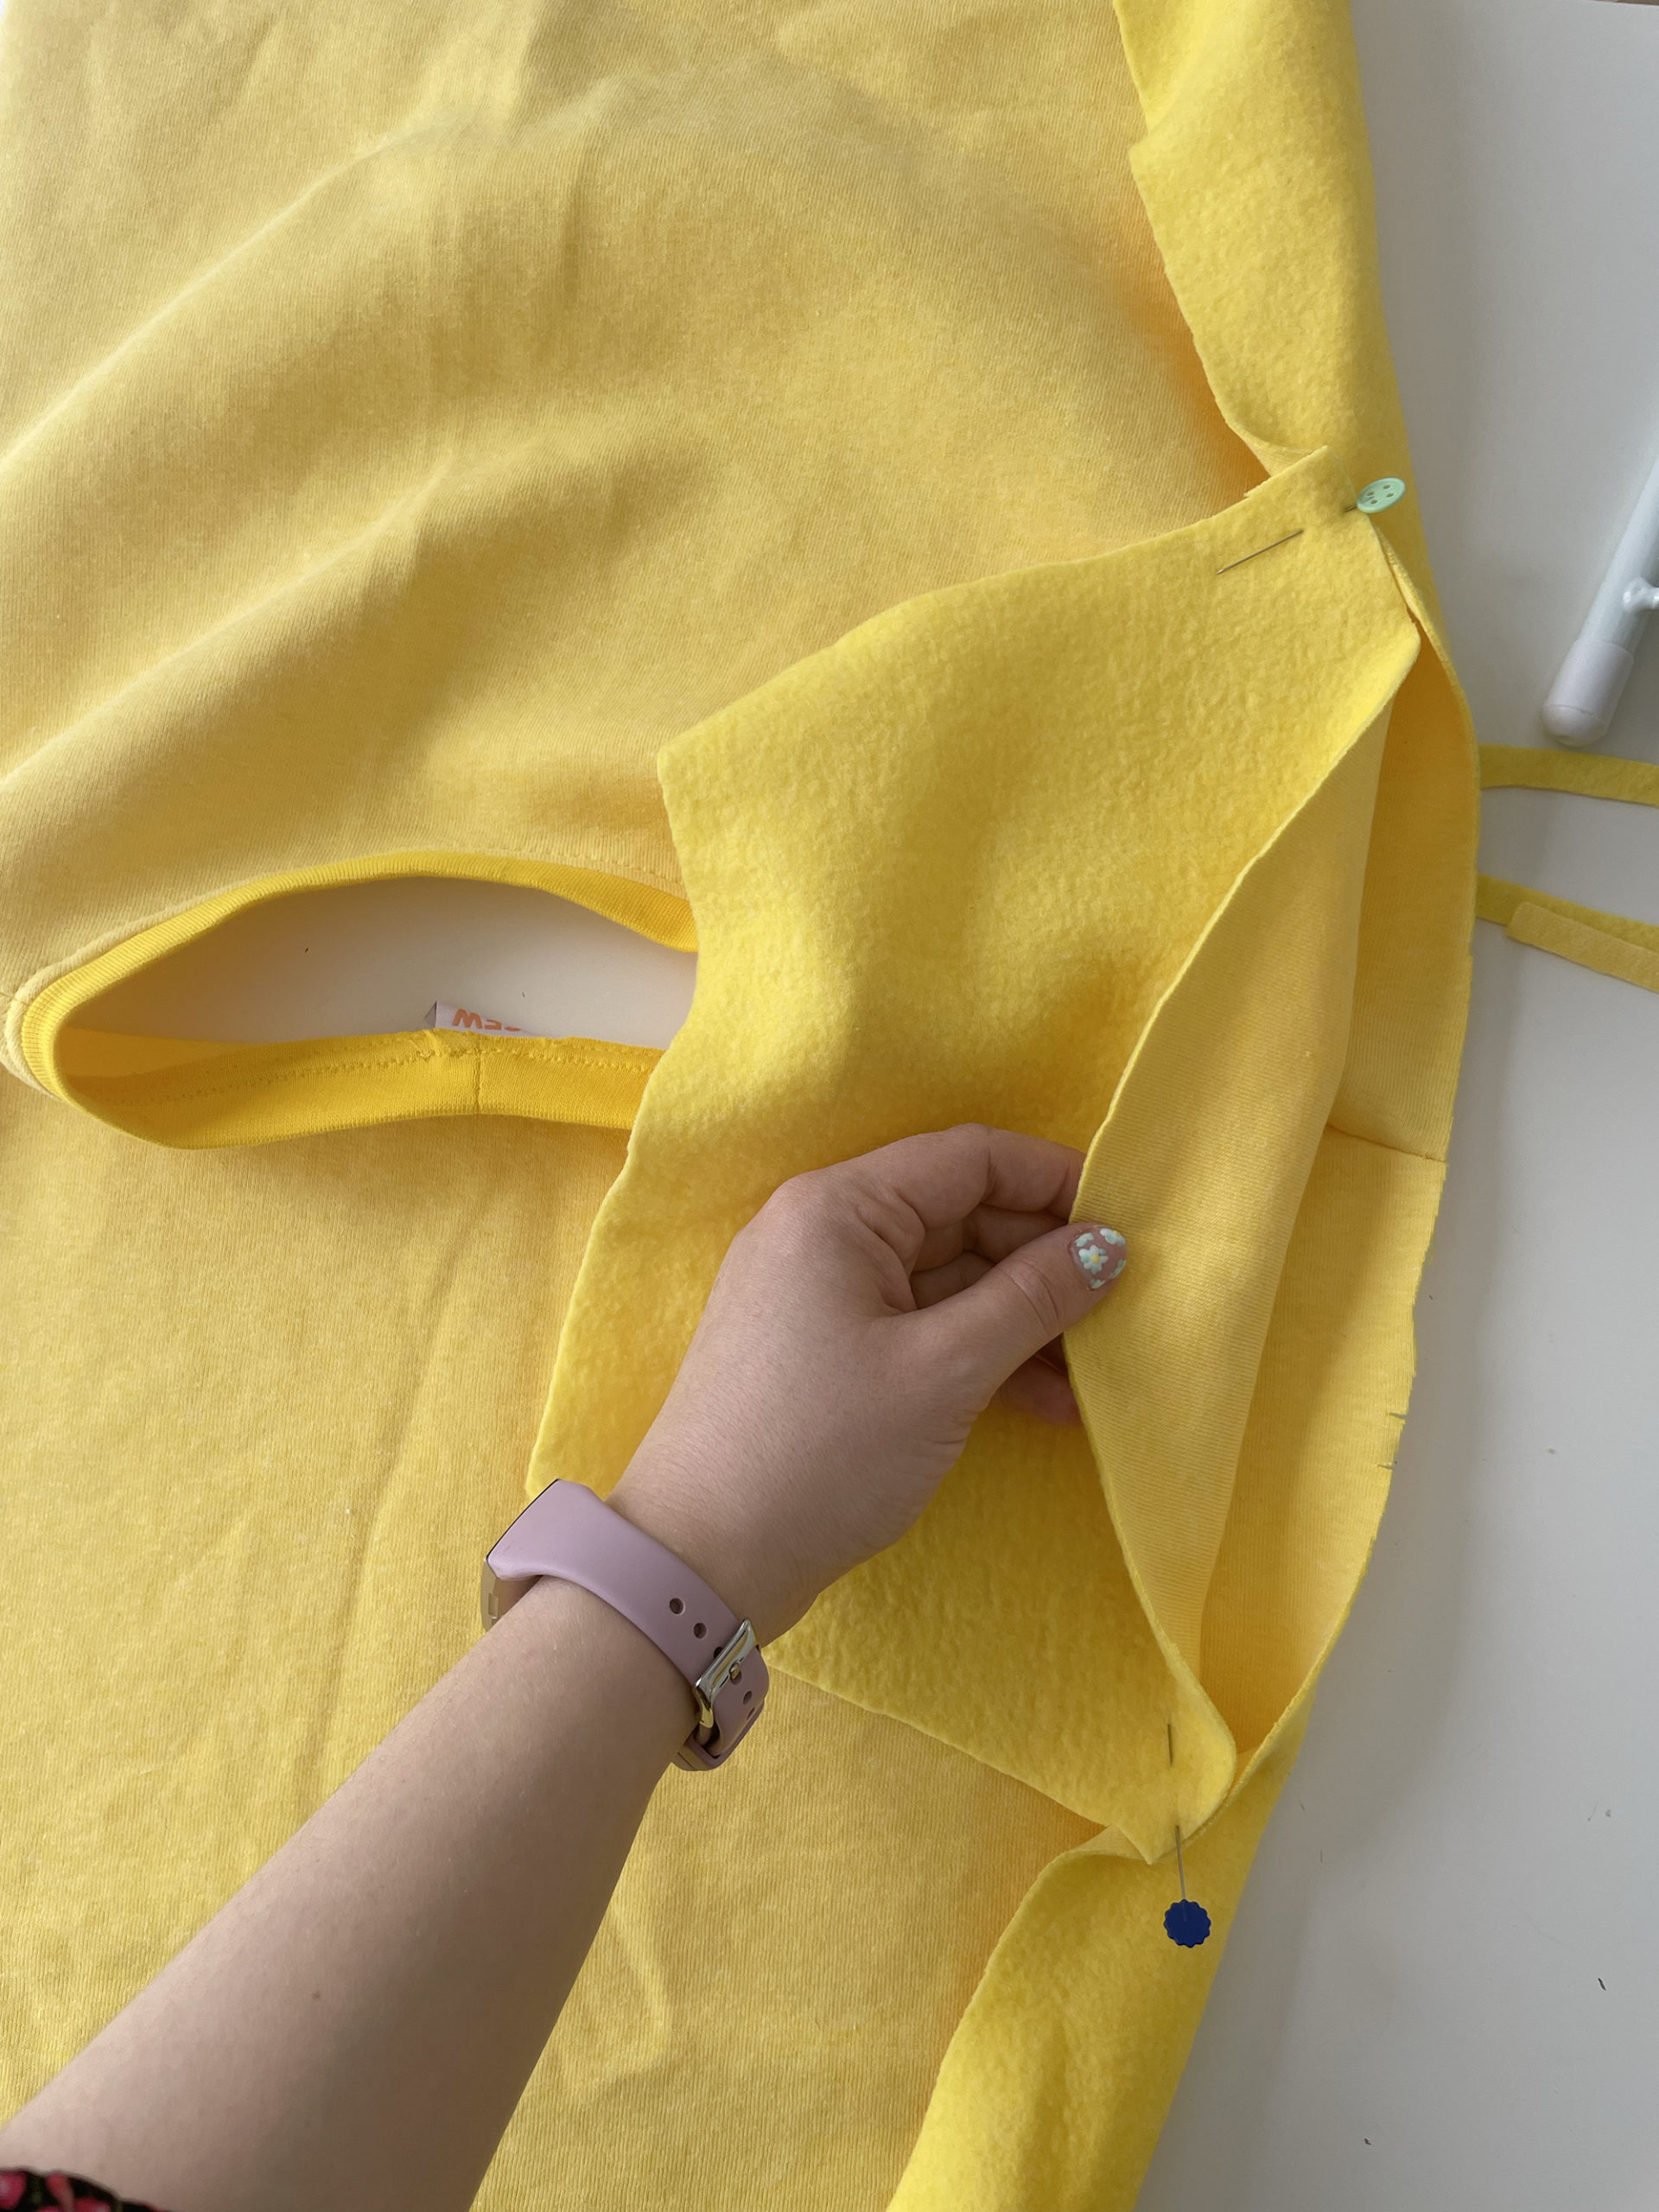
Step 5: Attach the sleeves to the body of the sweatshirt, right sides facing, and sew along the armhole edge. This is done whilst the body is flat.
Step 6. Right sides together fold the sweater sleeve and body together and stitch from the sleeve hem to the body hem, pivoting at the underarm. Repeat on both sides.
Step 7. Finish the sleeve cuffs and hem ribbing, in the same way as the neck ribbing.
*I top-stitched the sleeve hem and the hem ribbing to the main body also to make the finished sweater look neater.
draft and sew a sweatshirt pattern
It was really simple and easy to draft & sew a sweatshirt pattern from a ready-to-wear sweater! It took about 2 hours to sew it together but that is only because I was faffing around in between sorting out my machine. It’s a great quick and fun project to make something for your little one. So if you have a sweater you love of theirs and want to be able to recreate, now you know how!
I hope you enjoyed seeing it come together and now can feel confident to go and create your own. I you have any questions please feel free to message me on Instagram.  Happy sewing!